Monday, December 22, 2014

Elf on the shelf 2014 part 3

EIt's sad to see this tradition once again winding down for the year. I so look forward to Bob's visits! Sometimes I wish he could stay all year! 
Day 21: Bob is looking very festive in his ugly Christmas sweater! Oh and what is that in his hand? Our Christmas card! I'm glad it arrived in time for him to enjoy it!
Day 22: We ordered pizza the night before after our sons Christmas recital.  Bob ordered some too! I hope he tipped the driver well for coming all the way from the North Pole!
Day 23: Bob brought the kids a photo book with all the things they did last year! This one has actually become a tradition!
Day 24: The littles camped out in the living room to kick of the first night of Christmas vacation.  When they woke up they realized Bob and his friends joined the camp too! Their tents are books with napkins on top. They sat around a firesharing stories all night!
Day 25: Bob dressed our bathroom mirror up with Christmas bows!
Day 26: It's a bird! It's a plane! No, It's Super Bob!!! He is trying to fly with out ceiling fan! Oh and in case you were wondering, we never turned the fan on but gave it a nice manual push so the kids could see him "fly! 

Day 27: Bob and I both hope the kids never grow up! I made his Peter Pan costume using little felt scraps! 

Day 28: It's Christmas eve!! Bob is all set to take the reins to night and help Santa out!
Day 29: Christmas morning.  Time to say goodbye to this special guy!! He really was so much fun! Goodbye Bob Twinkles! See you next year!!

Elf on the shelf 2014 part 2


I can't tell you how amazing it is to see our littles faces light up every morning when they get up to search for Bob Twinkles! 
Day 11: Our oldest son had a few friends sleep over for his birthday.  Clearly Bob wanted in on the fun so he made a sleeping bag out of one of my slipper socks. 
Day 12: Bob is all wrapped up! This isn't exactly what we meant when we asked you to always be present Bob! Silly elf!

Day 13: Drag racing with the Toy Story gang! Go Bob!!

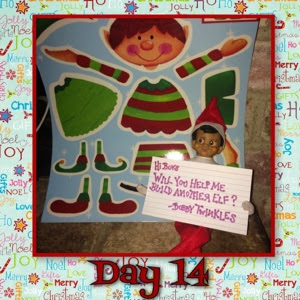
Day 14: Bob brought a cute window cling for the boys to play with!
Day 15: we had a big storm hit California on this day so it's a good thing Bob and Spidey were well prepared! 
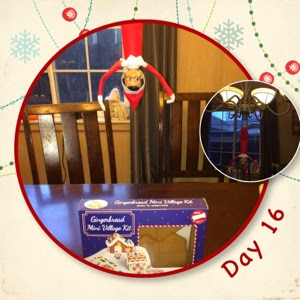
Day 16: Bob brought us a gingerbread village! So far he has brought us one every year!
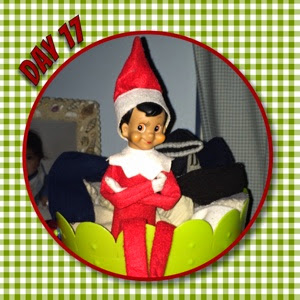
Day 17: it was a warning day.  Bob was not happy that the littles room was a mess! 
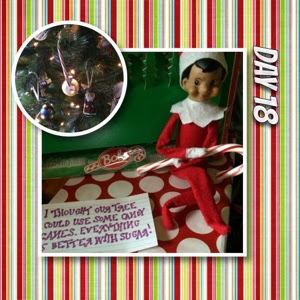
Day 18: Bob decorated our tree with candy canes from his shop in the North Pole!
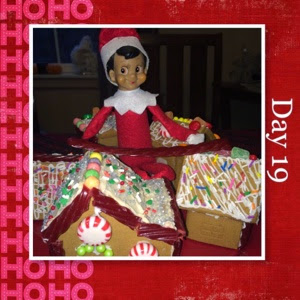
Day 19: We found Bob hanging out in our gingerbread village!
Day 20: We found Bob trying to hide in this reindeer disquise! Him and his reindeer games!! 

Thursday, December 18, 2014

Elf on the shelf 2014

Ok so I'm a little late posting these but let me tell you, they will be well worth the wait!!
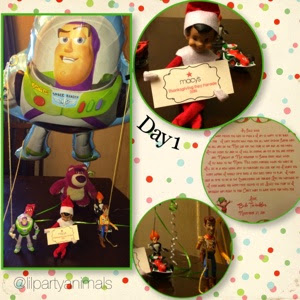
Day 1: Bob returned with a bang this year.  He was in the Macy's Thanksgiving day parade!! 
Day 2: he brought the littles official elf jammies from the North Pole!
Day 3: Hot air balloon rides!! He made it using a plastic cup, lantern and ribbon. Bob is so creative!
Day 4: sunday football in his own little chair! I just love his jersey!!
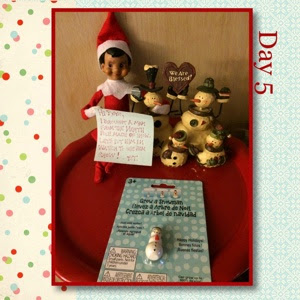
Day 5: Bob brought us a tiny magic snowman that grows in water! It was so fun to watch it get bigger each day!
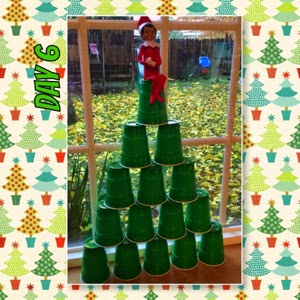
Day 6: Bob built this amazing cup pyramid with cups!! Amazing!
Day 7: Our oldest son turned 18! So Bob was hanging out on Nicks bed complete with hat and blower.  Looks like he's ready to party!
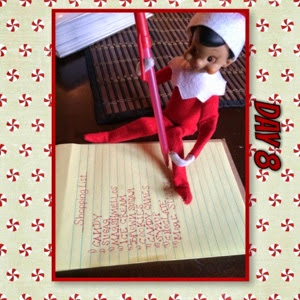
Day 8: Bob made me a shopping list.  He sure does love sugar.
Day 9: Bob on safari! He must have seen pics from our safari party!
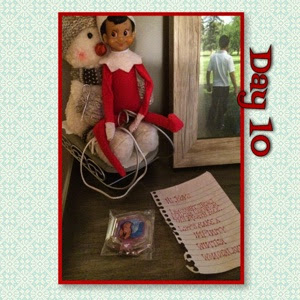
Day 10: Bob found the rare Frozen disks for Disney Infinity so that the boys can make a winter wonderland in the game!

Monday, December 8, 2014

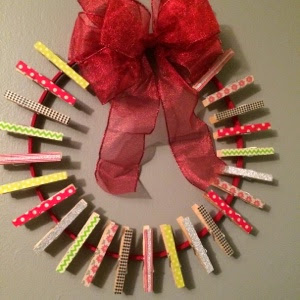
Christmas Card wreath

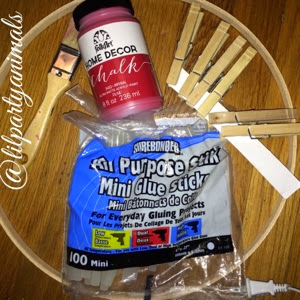
This was a super easy, quick and even better cheap craft!! I bought a quilters ring at Joanns Fabric Store for $1.99.  It actually came with 2 rings. I only used the inside ring so technically you could use the other ring to make a second wreath as a present.  Just a thought!


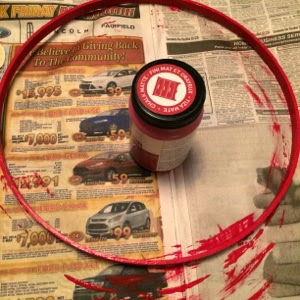
I started by painting my ring red. I used chalk paint but you could use acrylic.
Then I hot glued the clothes pins to the ring and covered them woth washi tape!!! And that's it!! Easy peesy!!

Tuesday, December 2, 2014

Ruffle tree skirt tutorial


I have been hoarding this stash of burlap since I threw my son's safari party almost 2 years ago.  When I bought it, I knew I was going to make a ruffle tree skirt after it had served its party purpose.  I have just been procrastinating which may have a lot to do with the fact that I had been recovering from a nasty neck injury.  
Let me start by saying this project is very very time consumming. It took me about 3 days. Probably 8-10 hours total. I did however have to take seceral breaks because of the before mentioned neck injury.  You could probably do it in one days time.  
Things you'll need:
2 yards of red fabric or which ever color you prefer.
2 yards of burlap so 4 yards of material total. I have also seen these made all one color and that looks great too.
Lots and lots of glue sticks. I probably used 10 or more. 
Glue gun.
Fabric glue
Dollar store felt tree skirt for the base
Sewing machine
I started out by cutting all my fabric into 4 inch wide strips.  The red fabric I cut just a smidge wider to allow for a very small hem which I did on my seeing machine.  I only hemmed the edge that would show. For the burlap, not going to sugar coat it, it was messy! I tried to zigzag around the edges to keep it from unraveling but it was just too thick. Then I had a stroke of genius and decided to use fabric glue around the edge that would show.  Once that was done I laid down my dollar store tree skirt upside down and plugged in my glue stick.
Then I carefully hot glued and overlapped each of my layers all the way around the circle.
As I finished each row, I alternated burlap and red fabric. When I got to the center I made a very small ribbon from the red fabric abd glued that around the center to give it a finished look.  
It looked even better once we had our tree up! I seriously can't stop staring at it!! I love it so much!!


Thursday, October 30, 2014

Toddler crafts for Halloween: Spider Web


Everyone that knows me knows I love all things kid and all things craft. So if you know my kids they are exactly the same! Be little but think big!! Even if your 3 in my house your covered in paint and glue already.  This morning Drew and I spent at least an hour making spider webs out of a left over paper plate and yarn! I just punched holes all around the plate.  I taped one end of the length of yarn I cut to the back of the plate and watched as he endlessly weaved the yarn in and out of the holes to form different patterns. He would have kept going if we didn't have to leave.  This little craft was also good for developing motor skills valuable for all preschoolers! Now all we need is a spider for our web.  Stay tuned...we might just catch one!!


Friday, September 19, 2014

Matty's Angry Bird-day Party 2014

Like all 7 year olds, our son Matty loves anything that has to do with video games  and in this house full of boys, Angry Birds is a favorite!  Planning this party was so fun! I hope you enjoy the photos as much as we enjoyed planning this special day!  


You know I am always happy when I can reuse decor from other parties and this wreath happens to be one of my favorites!  I have used it several times since first making it for our Dr. Seuss Party.  The tutorial for making can be found here: Ribbon Wreath tutorial
 This time around I had the treat table inside mostly because it was 107 degrees that day and we figured most guests would be inside.  But I actually think it worked out great and might be our new spot from now on!

 I made this last minute letter for the snack table and love the way it turned out!  SQUAWK!
 The snacks:  Pretzels aka Twigs
 TNT Brownies with little white fondant rectangles.  I used food writer markers to write TNT on them.
 Birds nests.  I made these before for our owl party.  Always a big hit and so easy to make!
 Sugar cookie piggies.  The snouts are made with green Wilton melts!
 I am super proud of these marshmallow pops!  I used a rolled out starburst to cut out the beaks.
 Iced tea...TN-TEA!
 Piggy Punch was just pineapple juice and sprite.

 Our backyard before the guests arrived

 And of course the piece de resistance... a full sized Angry Birds game!! I will have the tutorial for how to build the slingshot soon!  Basically it's made of PVC pipe that we spray painted brown.


 The birds are balls that I painted the faces on.  I made some ball piggies too.

 Our new favorite party thing is a photo booth.  The pictures we get are always my favorite! 
 Favors were easy.  I just bought a ton of these Angry Birds candy boxes at Walmart.
 I used Matty's stuffed birds around for decorations.


 I found this pinata at Target.
 I had planned on making cupcakes but then I saw this cake at Sam's club and it was perfect!


All in all the day was amazing!  I wish it hadn't been so hot but we still had a ton of fun!